In the previous article, I explained how to compile and run Java programs with CMD on Windows 10. Now, this post will provide a fast way to compile and run Java programs with Visual Studio Code.
Before I give further explanation, make sure you have read my previous article here. And please note that Visual Studio Code (referred to as VS Code) which I mean here is different from Visual Studio which can be used to create applications for various purposes of app development. VS Code is a light version of Visual Studio. VS Code is a cross-platform Code Editor created by Microsoft for Windows, Linux, and macOS. VS Code is also one of the Text Editor widely used throughout the programming world.
Download and Install VS Code
Open your browser, then navigate to the following link, http://www.code.visualstudio.com. Next, please download the VS Code according to the operating system you are using. When download is complete, install it like a normal desktop application.
How to Quickly Compile and Run Java Programs with Visual Studio Code
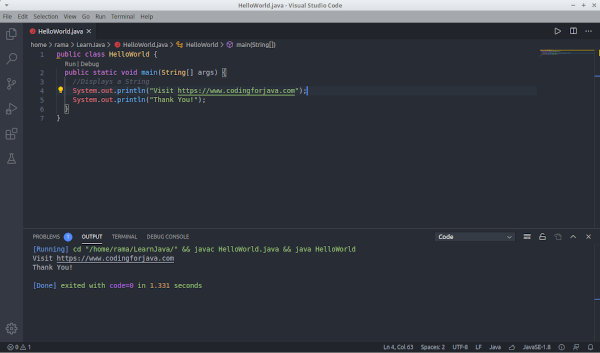
Open the VS Code program then type the java program code below. Then save it with the name HelloWorld.java. In this tutorial, I saved it in the D:\LearningJava directory.
public class HelloWordl {
  public static void main(String[] args) {
    //Displays a String
    System.out.println("Visit https://www.codingforjava.com");
    System.out.println("Thank You!");
  }
}
Using CMD Shortcuts
In the VS Code main view, press the F1 key or the Ctrl + Shift + P combination to open the command palette. Then you type the command and select Open New Command Prompt to open cmd which by default opens in the active directory of your Java file. Or, you can also use the shortcut Ctrl + Shift + C, and cmd will open immediately.
Using the Integrated Terminal
This method is almost the same as the previous method above. You can also use the integrated terminal to do all the commands in cmd, such as cd to change directories, javac for compile and java to run. You just need to press the Ctrl + ` (backtick) button, and the integrated terminal has appeared at the bottom of your VS Code. (note: backtick button is located to the left of the number 1)

Using Java Debug Extensions
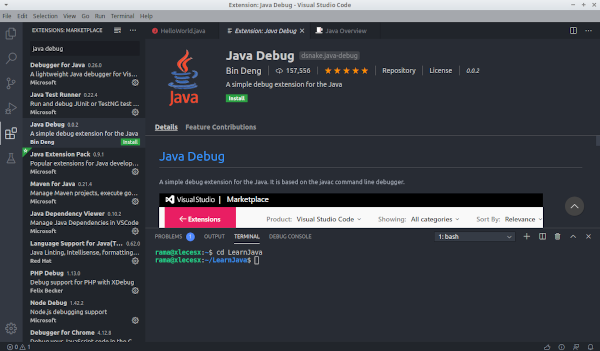
In my opinion, this is a very easy way. But you have to install the additional VS Code extension first. Here's how, press the Ctrl + P, then type ext install java-debug, then enter. Next, in your left sidebar, there will be several options available in the VS Code Marketplace. Select Java Debug published by Bin Deng (see details), then click install. Wait a few moments, click enable and restart your VS Code.

To use the extensions is quite easy, here are 3 main commands that will be used:
- Ctrl + Shift + U = to display the output section.
- Alt + C = Shortcut for compile (same as javac command)
- Alt + R = Shortcut for run (same as java command)
This is one of the extensions that can be used for several other programming languages besides Java, such as C, C ++, JavaScript, Python, and so on. This is also one easy way to compile and run Java programs.
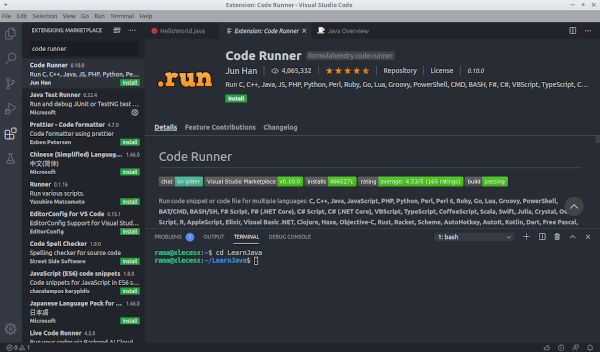
Using this method is very easy. Press Ctrl + P, then type ext install code-runner, then enter. Select Code Runner published by Jun Han (see details), then click Install and activate.

3 ways to use these extensions include:
- First, open the command palette by pressing F1 or Ctrl + Shift + P. Then type in run code, then enter.
- Second, use the shortcut Ctrl + Alt + N.
- And finally, just right-click on your workspace, and select Run Code.

So which method do you think is the easiest? Let us know if you also have other easy ways to compile and run Java programs with Visual Studio Code. If you are having difficulties, feel free to ask us through the comments at the end of the article. Hopefully, this article is useful. thanks.
